
Mountain Village part 2 of 2 - A Simple and Quick Painting Guide


Weathering Wood with Water Based Brush Pens
This quick paint and terrain guide aims to show how a few simple techniques and materials can create a really immersive piece of terrain. In fact a small diorama that can be used for gaming or just look nice on the shelf.
Gary Faulkner is head of the design department at Sarissa Precision and both he and the design team work hard to turn ideas and concepts into reality.
He is also responsible for all the painted kits you see on the Sarissa Precision website.
He recently wrote a series of award winning articles on working with MDF for Wargames Illustrated, so he knows what he’s talking about. This guide has been created to give you the quickest results with minimal effort whilst using easy to source supplies.
Brush Pens! What are they?
 |
 |
We all dry brush and we all colour wash. This is a different take on the same processes. Brush pens are simply pens with a 'soft' brush shaped nib. They come in a mad variety of colours too. Because they are pens they allow you to draw directly on to your buildings. They give an element of control that ink washes sometimes lack. They can be allowed to dry before weathering like a wash. This also means they can be washed off if you change your mind. I use them for both a full weathering as here, or as an under tint before dry brushing over.
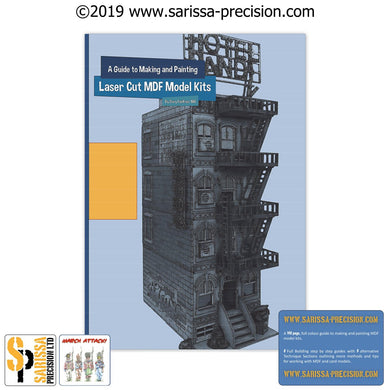
 We have also made this tutorial available as a FREE download click here to get your copy
First Things First

For the best results your building needs a quick thin coat of a matt paint. It can be a spray paint or a rough dry brush of emulsion or acrylic. I go over the spray paint with an acrylic to get some texture as spray paint can dry too flat.
Ready Draw!
It sounds crazy but that's what you do. As rough as you like, mark in where you want your shading effects. For these buildings I used a number of colours, brown, orange and green.
It's Rough but Don't Panic.

|
 |
 |
Once you've drawn where you want the weathering and shading, let it dry. It won't stain as an ink wash does.
Next stage is to 'wash' over the areas. You don't need too much water, just enough to soften the ink and start to feather it over the surface. Use different Brush sizes and shapes.
It Takes a Little Getting Used To

It's an unfamiliar technique, more like water colour painting than ink washing. However the result is a little bit more natural. If you use a light mat seal you can layer the effect further.
Once the weather wash is to your liking give it a quick once over spray of a matt sealer.
With this done I added a little shading to beams and planks. This shows how effective the pens are at getting the ink where you want it.
 |
 |
Final Stages

|
 |
These buildings are timber framed and have infill panels. The final painting stage is to colour in these panels.
I use a simple 3 colour method starting with olive brown then beige. The beige coat is painted on thinly. Add water to the brush so that the paint edges feather and allow the base colour to come through. The top colour is a bone wash. Again thin the colour so that it feathers and pools. I find this gives a more natural look as if the plaster and lime wash has faded and washed off.
The brush pens have a place here too. I use a mid grey to some of the edges and wash this in to give some variety to the surface.

The last thing to do is give the buildings a final dust coat.
I use a light grey to finely and lightly dust over (dry brush) the building. This blends the under layers and gives a textured effect.
I use a light dry brush of olive brown and bone around the foundations.
There is still a place for Ink Washes.

Give the building a good sealing of matt. This is to stop water getting to the water based inks.
Why?
This is where the odd ink wash or mud wash is useful. Used on the joints of walls to bases it 'grounds' the building. Add a little grass or grit too.
EQUIPMENT AND MATERIALS USED
|
Spray Paints Humbrol Acrylic Spray - Sea Grey 27 |
Ink Washes Citadel Shade - Seraphim Sepia (matt) |
|
Acrylic Paints Ravell (Matt) (361-86) Kakibraun - Olive Brown Ravell (Matt) (361-89) Beige - Beige (Yep...) Ravell (Matt) (361-76) Hellgrau - Light Grey Citadel Layer - Ushtabi Bone |
Brush Pens Ecoline Black (700) Ecoline Deep Sepia (440) Ecoline Light Orange (236) Ecoline Bronze Green (657) Ecoline Sepia (416) Ecoline Yellow Ochre (227) |
![]() Established in 2010, Sarissa Precision Ltd. has evolved into the industry’s leading manufacturer of (reasonably) awesome MDF model kits. Our range of expertly designed kits includes buildings and accessories for many periods and settings as diverse as the Dark Ages, WWII, SciFi and more. Working with leading companies - Warlord Games, Oathsworn Miniatures, Mantic Games and Footsore Miniatures & Games, Sarissa Precision also produce a number of bespoke lines for bestselling games such as Gates of Antares, Burrows and Badgers, The Walking Dead: All Out War and Gangs of Rome.
Established in 2010, Sarissa Precision Ltd. has evolved into the industry’s leading manufacturer of (reasonably) awesome MDF model kits. Our range of expertly designed kits includes buildings and accessories for many periods and settings as diverse as the Dark Ages, WWII, SciFi and more. Working with leading companies - Warlord Games, Oathsworn Miniatures, Mantic Games and Footsore Miniatures & Games, Sarissa Precision also produce a number of bespoke lines for bestselling games such as Gates of Antares, Burrows and Badgers, The Walking Dead: All Out War and Gangs of Rome.